
Want to build an eCommerce store without involving a developer? There are many WordPress eCommerce plugins available, and Shopify can be a perfect choice. In this post, we’ll help you learn how to build a WordPress eCommerce store with Shopify.
Why Shopify?
The answer is simple. Shopify is a popular eCommerce platform that lets you build an online store without any prior technical knowledge. It offers a secure shopping cart with over 70 different payment gateways, inventory management, shipping options, and more. You can easily install it on your WordPress site and start selling products without worrying about technical aspects such as setting up SSL or integrating a payment gateway.
Shopify is a hosted platform, but it also integrates with your self-hosted WordPress site and domain. Now that you’re aware of the features of Shopify, it’s time to find out how you can integrate it with your WordPress site.
Table of Contents
How to Setup WordPress eCommerce Store with Shopify?
- Visit the Shopify website to start a free trial. No credit card details are needed for the trial. Clicking on the Getting Started button directed you to the signup screen. Provide your email address and password, then choose your store name. Click on the “Create your store” button.
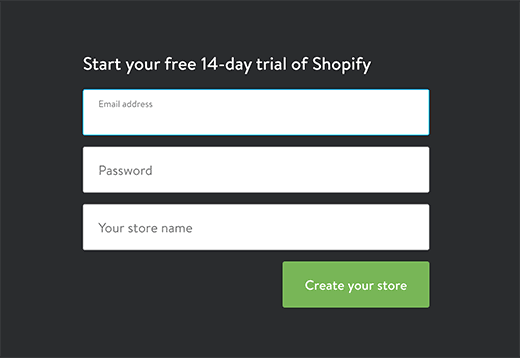
- You’ll be requested to provide your name and address to set up currencies and tax rates.

- After signing up, install the Shopify plugin into your WordPress website. Go to Plugins>> Add new and search results for Shopify.
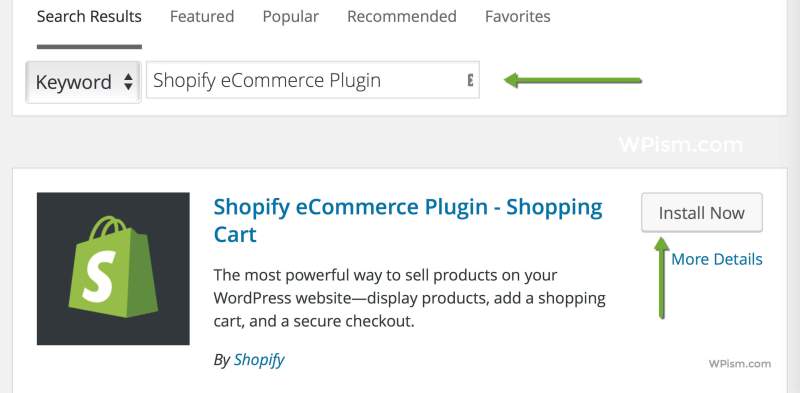
- Activate the plugin, and it will add the Shopify tab to your WordPress dashboard menu bar. Enter your store name and click on the “Connect” button.

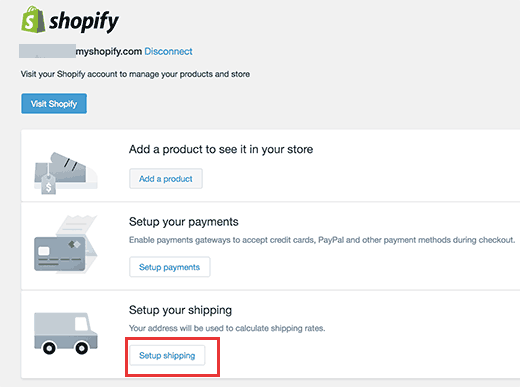
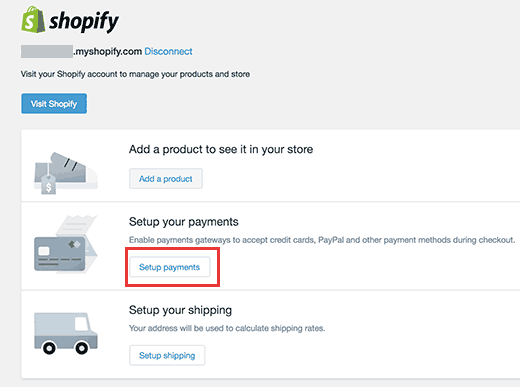
- Once your WordPress site is connected to your Shopify account, you’ll see the setting page. There are three things that you need to do.
- Click on the “Add a product” button in order to add products to your Shopify store. This will redirect you to Shopify’s page for adding products. When you are done, click on the “Save” button.
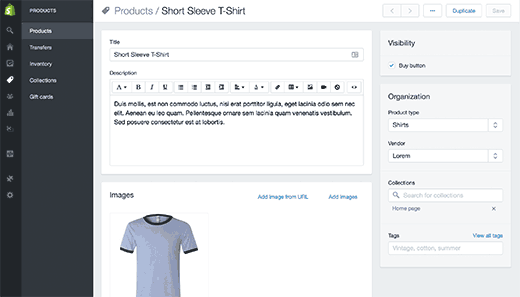
- When you have done adding all the products click on the “Setup payments” button.
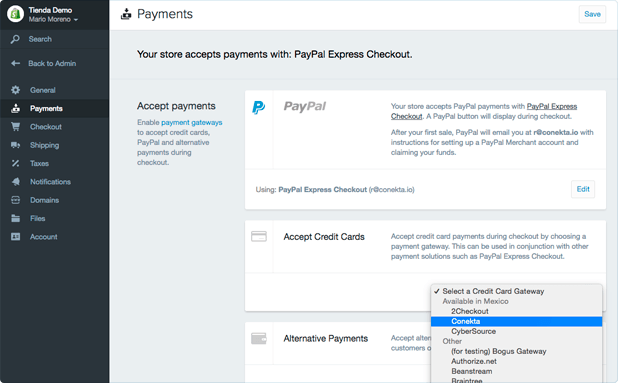
- This will open Shopify’s payment settings page. Shopify supports several payment gateways like PayPal, Stripe, and more.
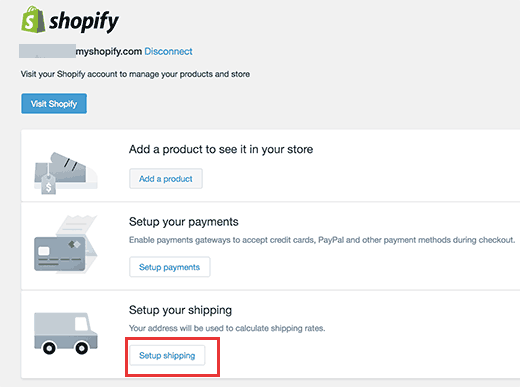
- The last step is Shipping configuration, for that click on the “Setup shipping” button. That will take you to Shopify’s setting page. Where you need to enter Shipping origin information, then shipping zones and the cost required to ship to that zone.
Adding Shopify Products to your WordPress eCommerce Site
Now you return to your WordPress dashboard to display the products you added to the Shopify store.
- Create a new post or page and click on the “Add Product” button.
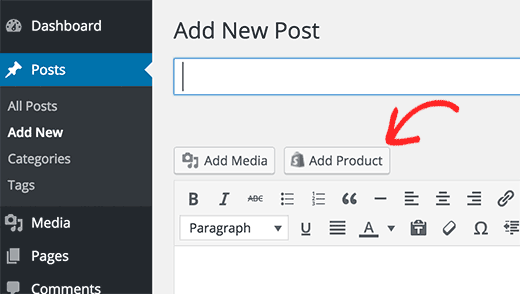
- Clicking on it will open a popup window to add your products or collection.
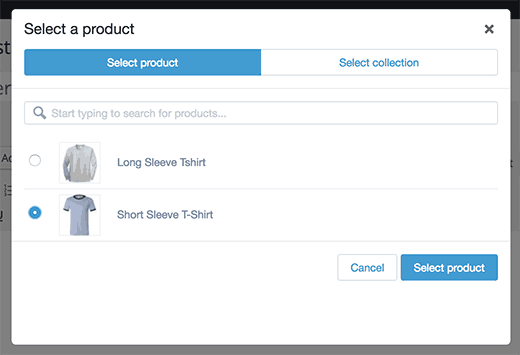
- Clicking on add product you will get two options to embed your product.
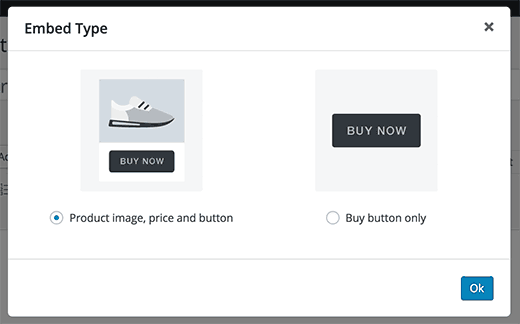
- It allows you to display your product with additional details or to add the Buy button only. That’s it! You are ready with your WordPress store with Shopify to publish your post and sell your products. Visit your site to see your product page. Not only in posts and pages, but you can also show products on your WordPress sidebar.
- It’s quite easy, go to Appearance>> Widgets page of your WordPress dashboard and you will find a Shopify in the available widget list.
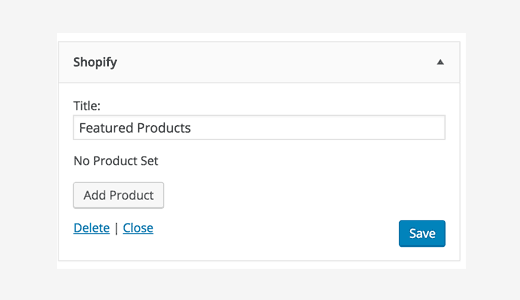
- Select the product you want to add and click on the “Add Product” button. Click the “Save” button to store your widget settings.
Conclusion
Congratulation! Now you’ve integrated Shopify with your WordPress store. We’d love to hear about your experience. Leave your comments below. Let’s Hire Shopify Experts to get the right eCommerce Solutions Today!
AboutManthan Bhavsar
Related Posts
The Role of Analytics in Web Design and Development: Metizsoft & Blacksmith
In today’s competitive digital landscape, analytics is one of those obligatory choices that seal the fate of a website...
Top 10 JavaScript Frameworks: A Developer’s Guide!
Table of Contents IntroductionUnderstanding the JavaScript FrameworkCore features of JavaScript FrameworksReasons Behind...

