How to Integrate Facebook Login Feature in Android Application? Let Us Discuss.
What is Facebook Integration? The Facebook SDK for Android lets people sign in to your app with Facebook Login. When people log into your app with Facebook, they can grant permissions to it so you can retrieve information or perform actions on Facebook on their behalf. In this blog, we will learn how to integrate […]

What is Facebook Integration?
The Facebook SDK for Android lets people sign in to your app with Facebook Login. When people log into your app with Facebook, they can grant permissions to it so you can retrieve information or perform actions on Facebook on their behalf.
In this blog, we will learn how to integrate the Facebook login feature into the
In some situations, the app user will need to log in to the Android app for further processing. Generally, Facebook Login and Google Login are used in most Applications.
Steps to Integrate Facebook into an Android Application:
First, create a new project in Android Studio and name it “MySocialapp”.
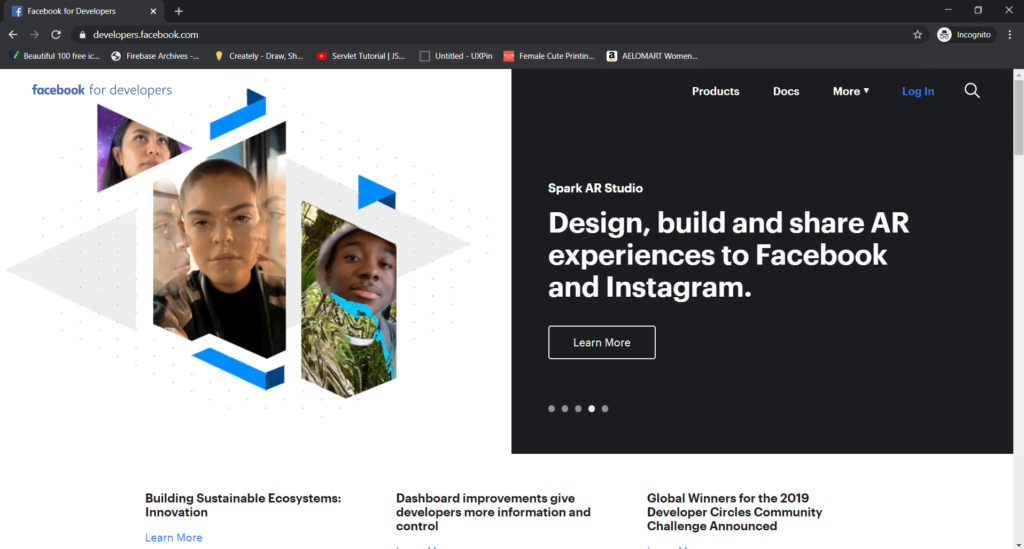
Now, go to the Facebook Developer console and create a new App. Then, follow the link below to log in and create a new app. Facebook Developer Documentation
You will find this screen
Now click on Log In and Log In with your Developer account on Facebook.
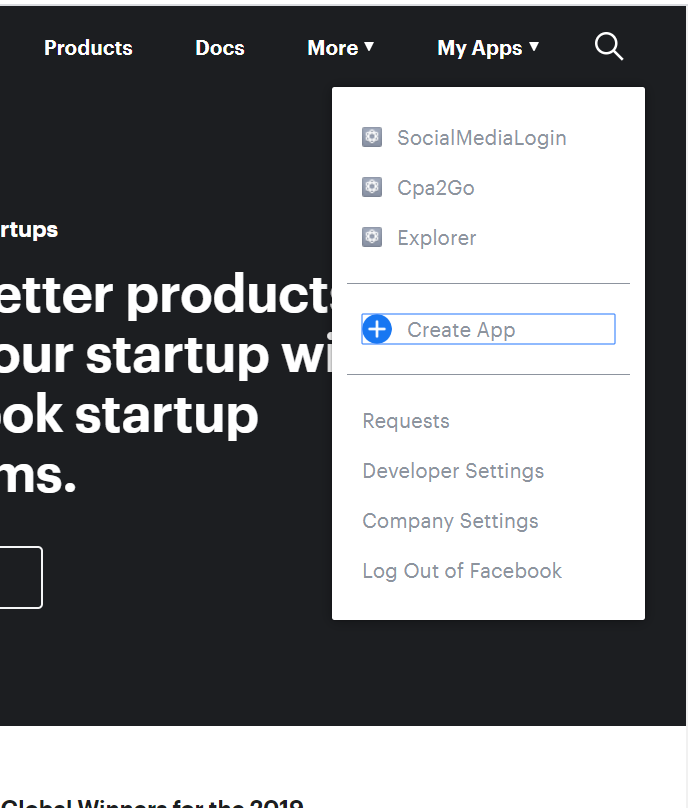
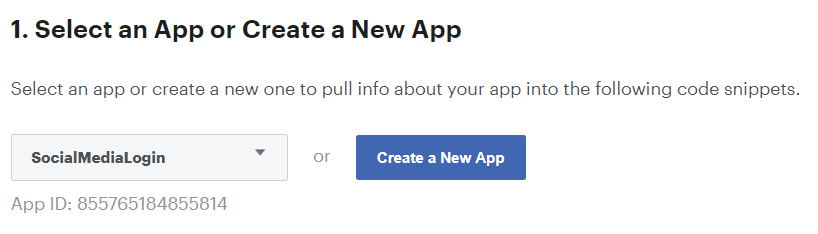
After successfully Logging In, you will find the screen below. Then, you need to click on магазин постельного белья My Apps from the menu bar and either select “Create App” or go to Docs >> Facebook Login >> Android. Finally, select your newly created app from the document’s “Select an App” section.
Then, Create A New App ID
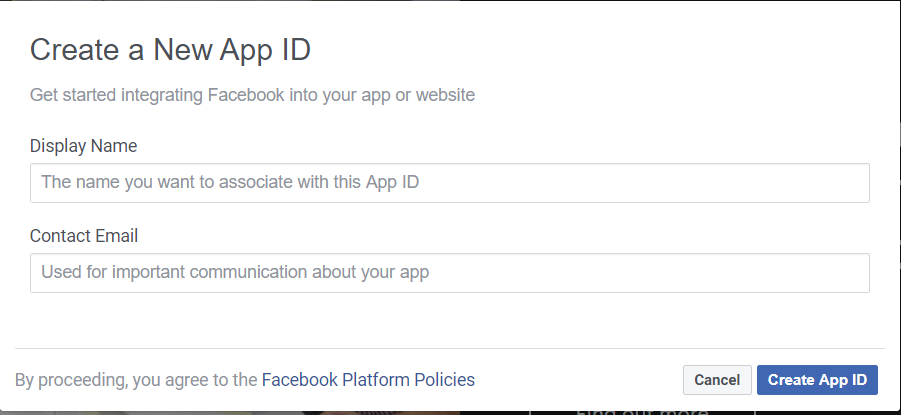
Give a proper name, display your name, and provide your email ID.

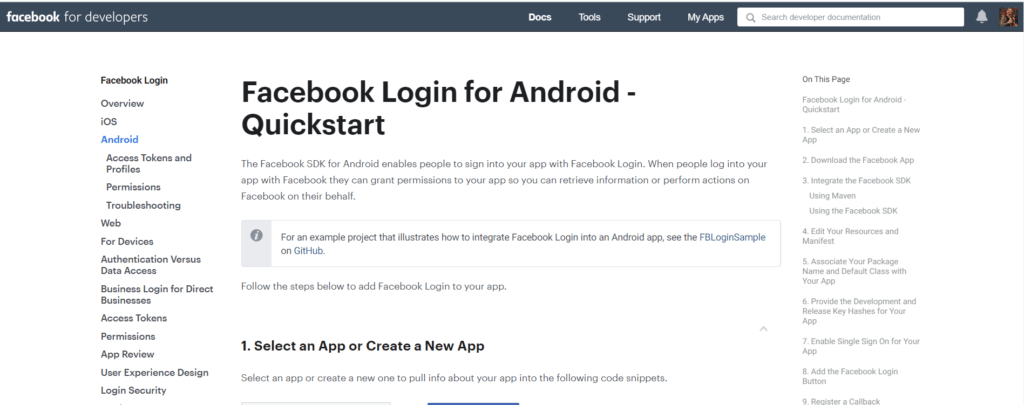
Now, after clicking on Android, you will find the screen below
Find your newly created app and select it from the drop-down list.
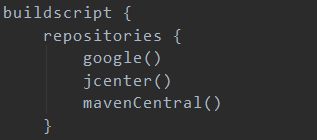
The next step is adding the Facebook SDK to the Android Studio Project. Open MySocialapp >> Gradle Scripts >> build.Gradle (Project). Lastly, add these libraries in buildscript>>repositories.
In your project, open MySocialapp>>Gradle Scripts>> build.Gradle (Module App) and add the following implementation statements to the dependencies section.

For this application, we need a circle image view to display the Facebook profile pic тактичні рукавиці без пальців. Additionally, we need an image loading library to load an image into an ImageView from a URL.
In this project, we use the Glide image loading library and a third-party Circle Image View library. Therefore, add the dependency for using them as given below. Please note, I have used ready GitHub libraries here.

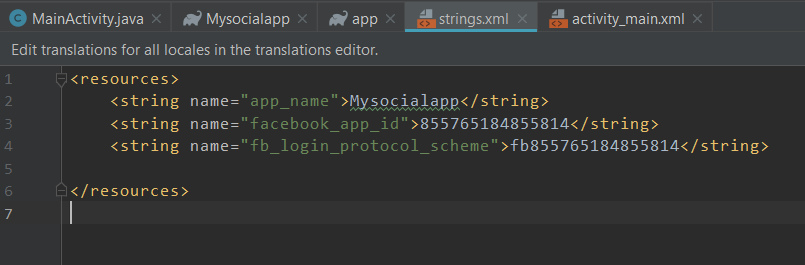
From the Facebook Login Configuration page, copy the facebook_app_id and fb_login_protocol_scheme string resources. Then, add them to the Strings.xml file in your Android Studio project.
Open string.xml
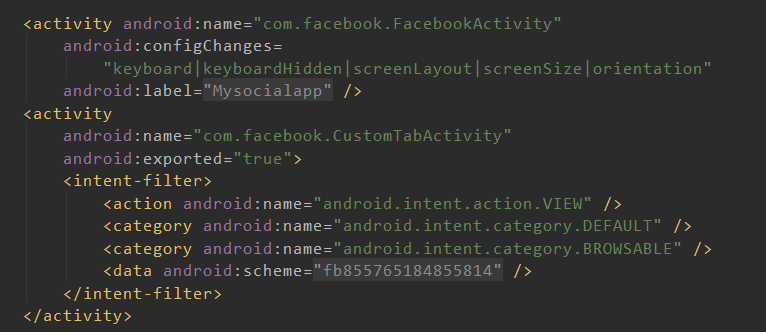
Open the AndroidManifest.Xml file and add the following statements to it.
Internet Permission.

Metadata element that mentions your app ID.

Facebook Activity and intent filter for Chrome Custom Tabs.
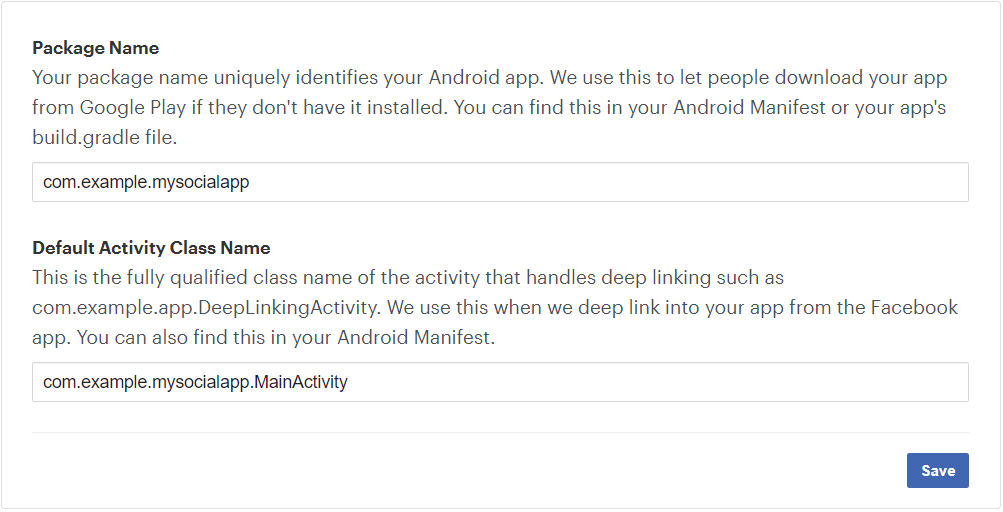
Associate Your Package Name and Default Class with Your App.
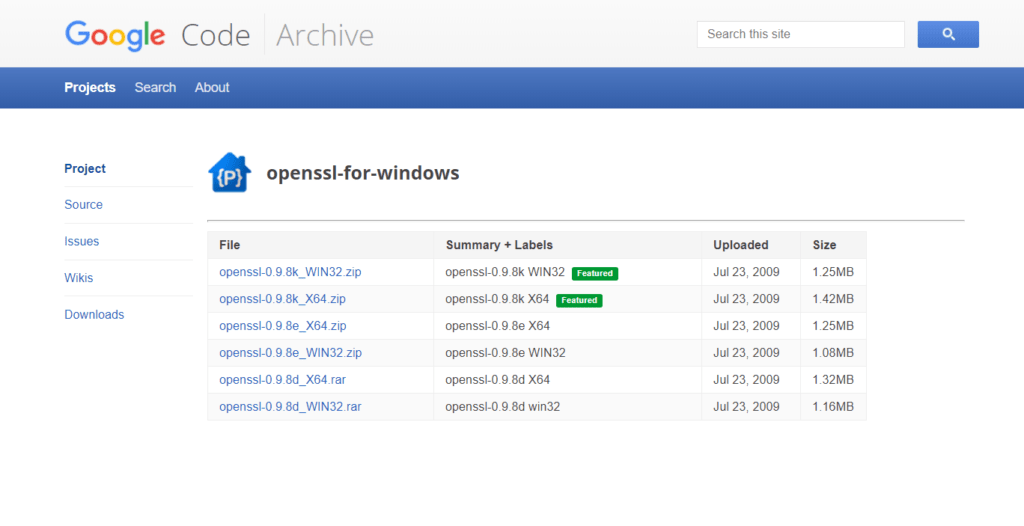
You must provide the development and Release Key hashes for your App. To do this, you need a key tool that is available with the Java SDK, your release or debug key-store, and on the Windows platform, you need the OpenSSL library.
Download OpenSSL – for – windows from Google code Archive. You will find this below-mentioned screen. I have downloaded OpenSSL-0.9.8e_X64.zip.
Extract the folder into C Drive and copy the path of that folder.
C:openssl
Now, find your Java SDK path. In my PC this is a path for Java bin folder.
C:Program FilesJavajdk1.8.0_144bin
Now, find debug. keystore path from your This PC and copy it.
In Users>>User_Name>>.android>>debug.keystore, Here this is the path in my PC.
C:UsersHINAL.android
Now Go to “C:Program FilesJavajdk1.8.0_144bin” bin folder and start the command prompt.

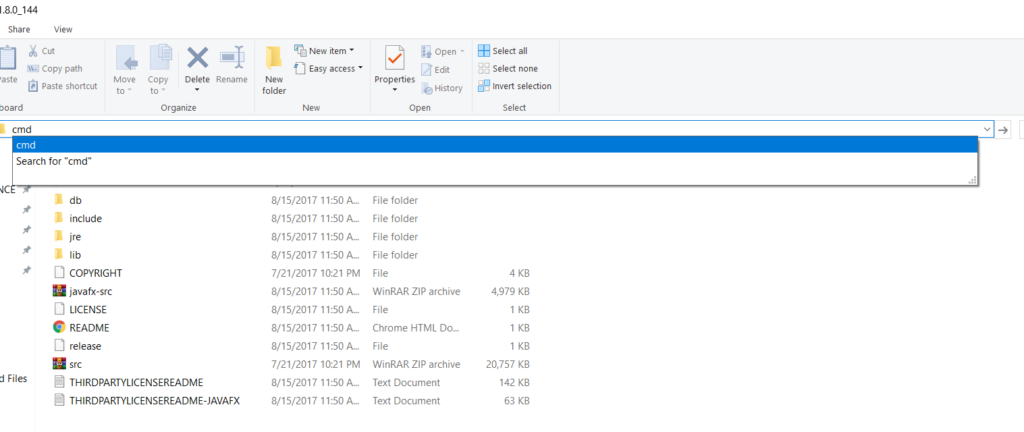
Search for CMD

Copy the path from Step 6 on developers.facebook.com

(keytool -exportcert -alias androiddebugkey-Keystore (Your Keystore path)debug.keystore | (Your OpenSSL path)openssl sha1 -binary | (Your OpenSSL path)openssl base64)
(Your Keystore path) in place of this add your debug.keystore path.
(Your OpenSSL path) in place of this add your OpenSSL path.
After adding all paths, my path will be:
keytool -exportcert -alias androiddebugkey -Keystore “C:UsersHINAL.androiddebug.keystore” | “C:opensslbinopenssl” sha1 -binary | “C:opensslbinopenssl” base64
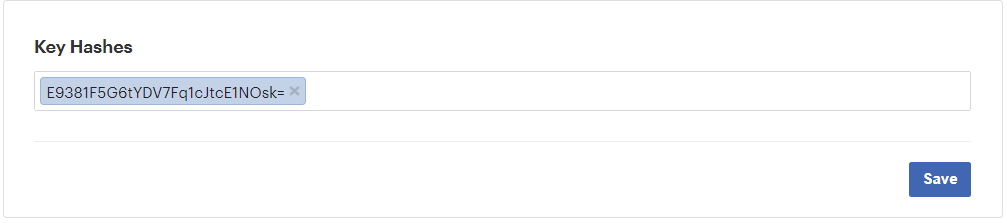
Add this path into a command prompt and get hash key.
Add the hash key into step 6 and save it.
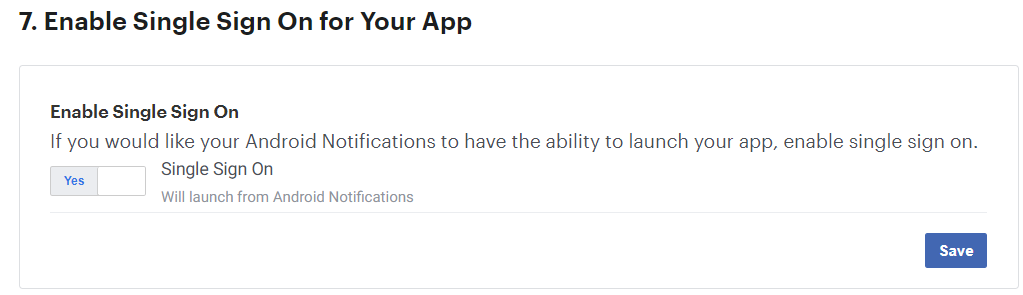
Now, Enable Single Sign-On for your App.
Add this code to your activity_main.xml file
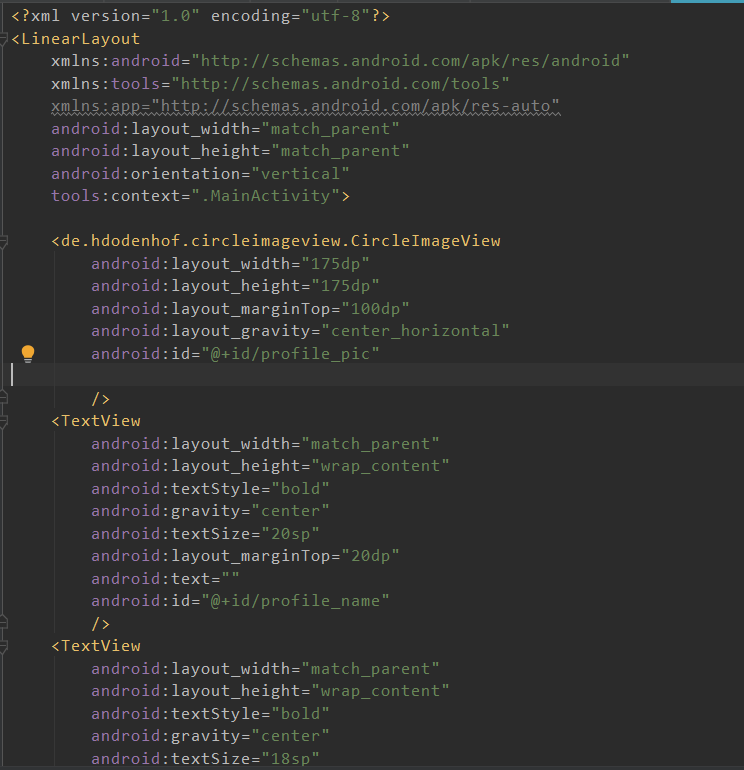
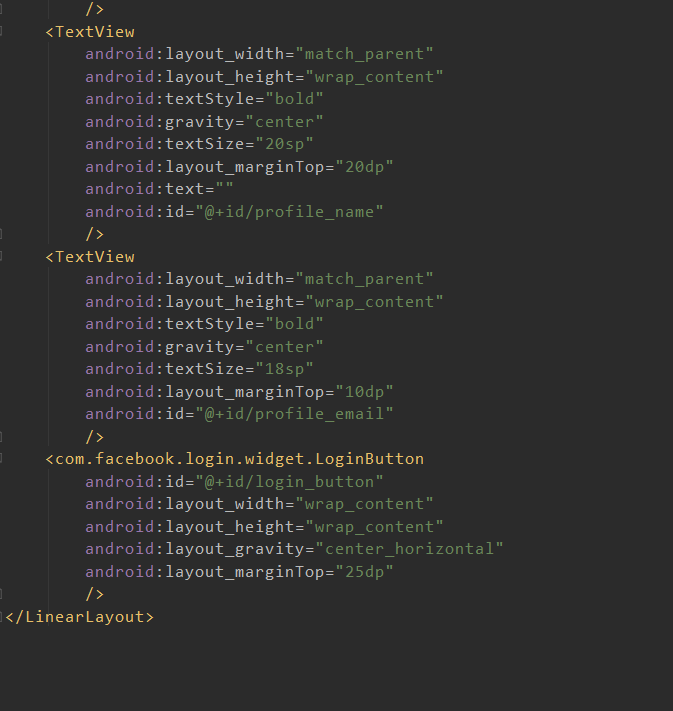
I have added static values to show this Component. Now the screen will look like this.
Add this code to your MainActivity.java file.
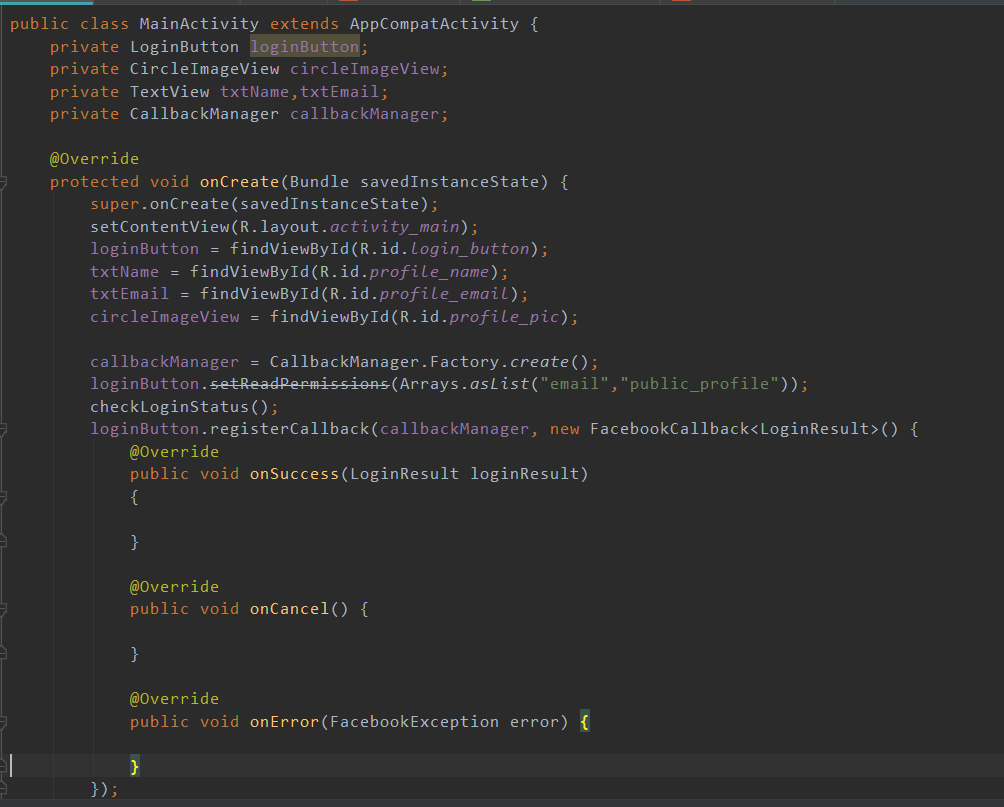

Request email and public profile permissions on the Facebook Login Button.
To handle login response, create a CallbackManager object by using Factory. create
We will register a callback with the LoginButton to respond to the login result.
If the login succeeds, the LoginResult parameter of the onSuccess() callback method has a new AccessToken and the most recently granted and denied permissions.
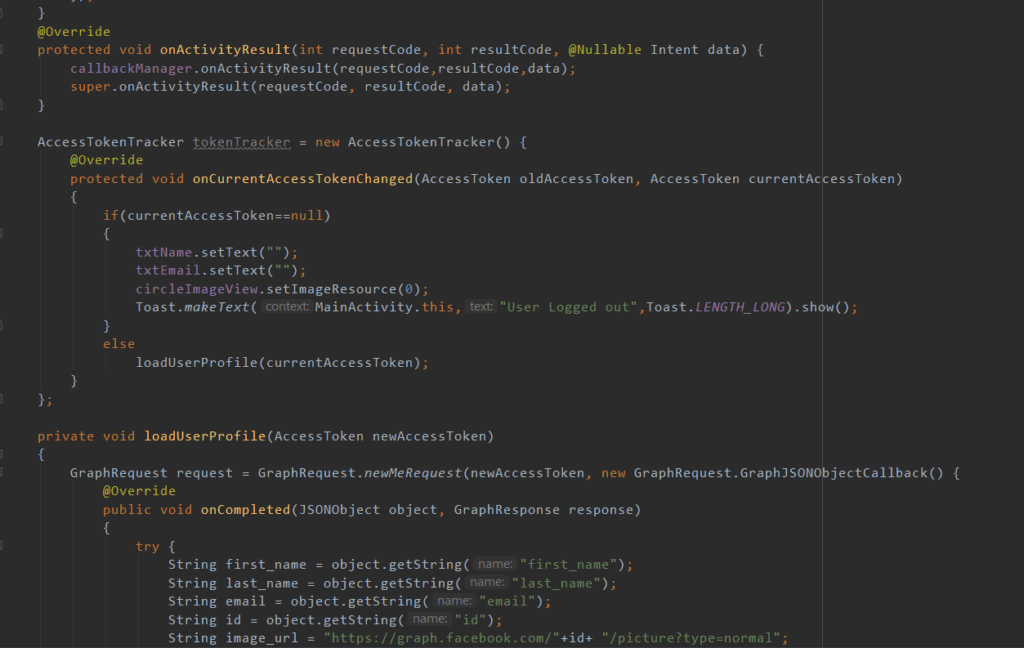
In this example for getting a login response ліхтар кемпінговий, we are not going to use the callback methods with LoginButton. Instead, we use the AccessTokenTracker class.
We need to override the onActivityResult method. Then, use the callback manager to pass the login result to the LoginManager.
To check the login status when the app loads, call the getCurrentAccessToken() method using the AccessToken class, and if the method returns null, it means the user is logged out.
To read user information from the AccessToken, we use the Graph API. Specifically, Facebook uses a special API, called Graph API, to read and write information on the Facebook platform. Consequently, Graph API brings the result in the form of a JSON object or JSON array.
Output:
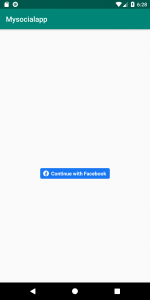
Login Screen:
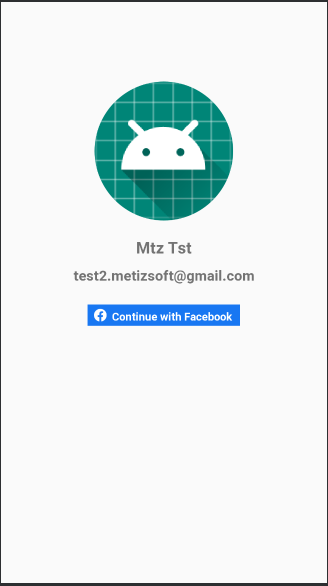
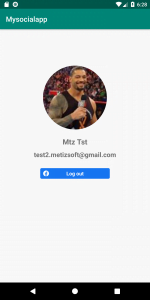
Logged-In Screen:
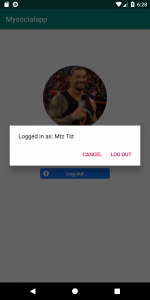
Log Out Screen:
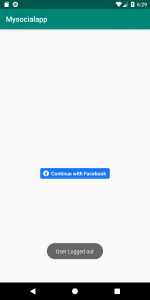
Logged Out Screen:
Conclusion
With the end of this tutorial, we hope we were able to fulfill our purpose of helping you to integrate the Facebook login feature in an Android application. We tried to explain the whole process with the help of screenshots with proper descriptions, плитоноска койот. If you follow the above steps without any error, you will be able to integrate Facebook login into your Android application successfully.
If you still have any doubts, don’t worry. You can always get in touch with us for any kind of query.


Leave a Reply