Let’s start from the beginning, if you are looking for a document scanner the same as Doc Scanner application then you are at the right place.
There is only one best library that I can suggest to you and that is react-native-document-scanner.
Let us now look at some of the best features of React Native Document Scanner Library.
Features:
- Live detection
- Live camera filters (brightness, saturation, contrast)
- Flash
- Easy to use the base64 image
- Get URI as well base64 image
Installation:
Use version >=1.4.1 if you are using react-native 0.48+
$ npm install react-native-document-scanner –save
$ react-native link react-native-document-scanner
By doing this you will have this library into your project. Now you can play with it.
Note:
This library uses the camera so you need to add NSCameraUsageDescription in Info.plist, Please add a proper description that why you want this camera.
With Cocoapods – If you are installing with cocoa pods then you can write below lines to pod file and then user pod install command to install.
pod ‘RNPdfScanner’, :path => ‘../node_modules/react-native-document-scanner/ios’
Manual Linking:
If still, you are unable to use this library then you need to do manual linking.
Go to XCode ->> Project ->> Library right click to Library and select “Add Files to project_name” and choose XCode project from node_modules ->> react-native-document-scanner ->> ios.
Now expand the added library and goto products and drag inside lib into build phases of your project, then open “Link Binary with Libraries” and drag that added Library. And you are done with the installation process.
Usage:
Below is the code snippet to use this library:
Properties:
Property | Default | Type | Description |
---|---|---|---|
overlayColor | none | string | Color of the detected rectangle : rgba recommended |
detectionCountBeforeCapture | 5 | integer | Number of correct rectangle to detect before capture |
detectionRefreshRateInMS | 50 | integer | Time between two rectangle detection attempt |
enableTorch | false | bool | Allows to active or deactivate flash during document detection |
useFrontCam | false | bool | Allows you to switch between front and back camera |
brightness | 0 | float | Increase or decrease camera brightness. Normal as default. |
saturation | 1 | float | Increase or decrease camera saturation. Set 0 for black & white |
contrast | 1 | float | Increase or decrease camera contrast. Normal as default |
quality | 0.8 | float | Image compression. Reduces both image size and quality |
useBase64 | false | bool | If base64 representation should be passed instead of image uri's |
captureMultiple | false | bool | Keeps the scanner on after a successful capture |
Manual Capture:
After implementation, you can see there might be chances that you can not scan some of the documents due to some extra edges or low light or any other reason. Then you need to capture it manually.
So you need to give a ref to the Scanner component and use this.scanner.capture() method to capture manually, where a scanner is the ref of the scanner view.
Reference: <Scanner ref={(ref) =>this.scanner = ref} />
Capture: this.scanner.capture();
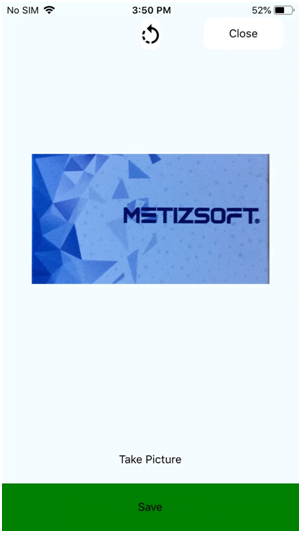
Screenshots:
Live to scan, as you can see it directly captures the edges and gives the rectangle image.
This is the resulting image. You can save it or you can use it for further use.
Conclusion
React Native Document Scanner has all the features to ensure proper document scanning. If you still have any queries or doubts regarding react native document scanner, you can write to us at sales@metizsoft.com. We will be more than happy if you enlighten us with your useful insights. We at Metizsoft Solutions, a mobile app development company always strive to bring useful technological updates from the world of mobile app development for our readers.